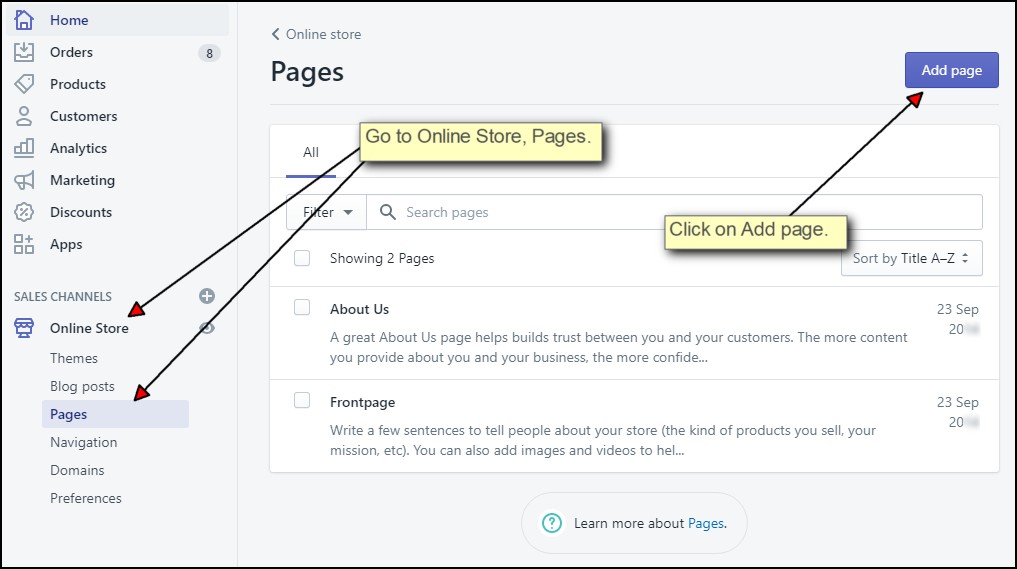
Has your Shopify contact page been bombarded with spam lately? To stop spam posted by bots, one of the options is to add Google reCaptcha on your Contact Us page.
Google currently provides two versions of their reCaptcha: reCaptcha v2 and reCaptcha v3. The difference between these two version is that v2 requires the user to click on the "I am not a robot" check box (Captcha challenge) while v3 does not. ReCaptcha v3 scores your user's traffic based on Google's proprietary algorithm and the site owner gets to determine what actions to take based on the score.
Google reCaptcha v2
There are not that many sites on the Internet that show you how to implement the Google reCaptcha v2 code. If you Google search "Add reCaptcha to Shopify contact form", you will probably find some pages that show you how to first disable the "Send" button by adding a "disable" attribute:
<input type="submit" id="contactFormSubmit" value="Send" class="btn" disabled />
You can then add these lines of Javascript code to enable the "Send" button after the user passes the Captcha challenge:
<script src="https://www.google.com/recaptcha/api.js?onload=onloadCallback&render=explicit" async defer>
</script>

<script>
  var actCallback = function (response) {
    $('#contactFormSubmit').prop("disabled", false);
  };

  var onloadCallback = function () {
    var widget = grecaptcha.render(document.getElementById("re-captcha"), {
      'sitekey' : "123456789", // Sitekey generated from Google reCaptcha
      'theme': "light",
      'callback' : actCallback,
    });
  }
</script>
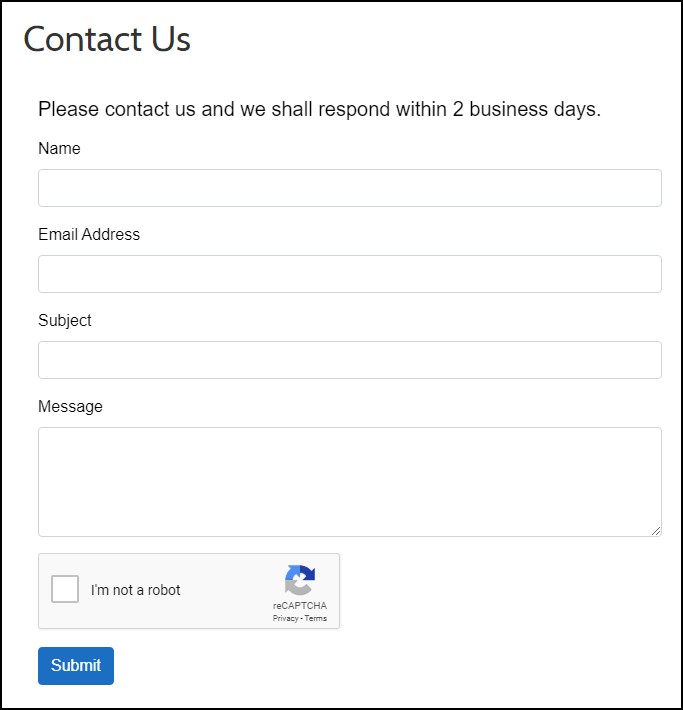
Here's how it's suppose to look like when implemented:

The code above might have worked fine at one point.
However, Shopify has since implemented their own Google reCaptcha v2 on all contact forms (and there's no option to turn this off). Whenever there are two submissions done from the same IP address within 24 hours, the user will be redirected to a "challenge#contact_form" page to complete the Captcha challenge:
This inteferes with the Javascript code mentioned above and the user will get a "Page not found" error after clicking on the "Send" button:
For Shopify site owners who want to implement Google reCaptcha v2 on their Contact Us page, don't waste your time trying the code above. It will break your page and your customers won't be able to contact you. Moreover, since Shopify already has their own Google reCaptcha v2 built-in, there's really no need for you to do redundant work.
Google reCaptcha v3
What about Google reCaptcha v3? Can we take advantage of this newer version of Google reCaptcha, which doesn't require any interaction from the user and is less intrusive? Shopify site owners have already asked the same exact question on Shopify's Community: Adding Google reCaptcha v3 to the Shopify contact form. It turns out that adding Google reCaptcha v3 is a lot simpler than v2. All you need are these lines of Javascript code:
<script src="https://www.google.com/recaptcha/api.js?render=_reCAPTCHA_site_key"></script>
<script>
grecaptcha.ready(function() {
    grecaptcha.execute('_reCAPTCHA_site_key_', {action: 'homepage'}).then(function(token) {
    });
});
</script>
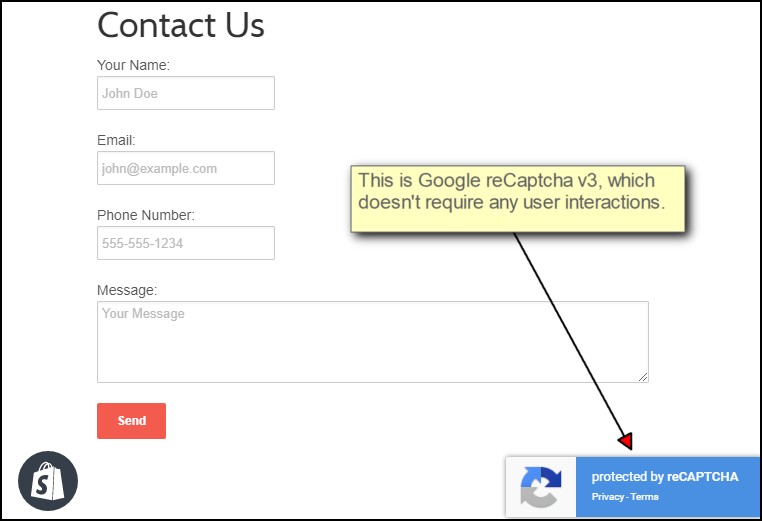
This is how it's supposed to look like after implementing the code:
There's no button to disable, no Captcha challenge to display. A piece of cake, right? Well, not quite.
It turns out the code doesn't really accomplish anything at all! All it does is displaying the "protected by reCAPTCHA" icon at the lower right corner of the page. There's supposed to be additional server code to retrieve a "score" from Google to figure out what action to take next.
If you go through all 5 pages from the Shopify Community thread above, you will see that the contributors to the thread were quite confused. They thought the Javascript code mentioned above was enough to trigger the "Captcha challenge" for Google reCaptcha v3. They probably didn't realize that there's supposed to be no "Captcha challenge" for Google reCaptcha v3! The user is not suppose to even see any "I'm not a robot" check box.
It's not possible to write additional server code on Shopify to evaluate the "score" from Google and redirect the user to the appropriate page. Shopify simply does not allow this kind of code for security reasons. The whole topic on Adding Google reCaptcha v3 to the Shopify contact form is a waste of time!
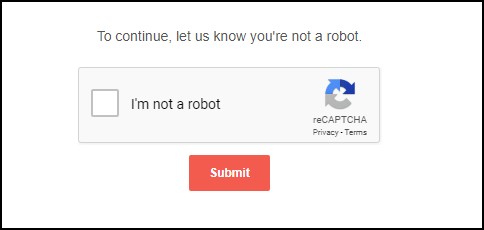
The contributors on the thread probably didn't realize that the "Captcha challenge" was actually implemented by Shopify by default:
The "I'm not a robot" check box shows up regardless if the code for Goolge reCaptcha v3 was implemented or not! It's odd that no Shopify Expert has stepped in and guided the lost souls to the right direction. These poor Shopify site owners need to be told that Google reCaptcha v3 will never work on their Contact Us page.
Conclusion
All the code samples that show you how to implement Google reCaptcha v2 or reCaptcha v3 don't really work. Don't waste your time implementing any of them. Since Shopify already has Google reCaptcha v2 built in, there's really no reason for you to implement your own.
But why are you still getting spam from your Contact Us page? It turns out Google reCaptcha is only good at stopping bots from spamming your site. If a human is sending you spam from your Contact Us page, there's nothing Google reCaptcha can do to stop that.
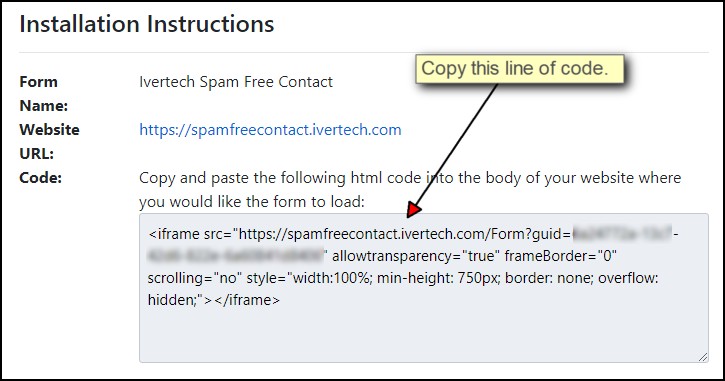
Instead of forking out monthly fee for a Shopify app, you can open a free account at Ivertech Spam Free Contact and copy and paste one line of HTML code to stop spam. Ivertech Spam Free Contact has A.I. (Artificial Intelligence) built in to effectively filter spam, regardless if it's created by bots or humans. It's a lot more efficient than most of the Shopify apps and it doesn't get interfered by the built-in reCaptcha from Shopify.
And best of all, it's free!